Overview
This guide walks you through how to connect your Webflow CMS to Sight AI so that AI-generated articles can be automatically synced to your selected CMS collection (e.g., "Blog Posts").
Step 1: Generate Your Webflow API Token
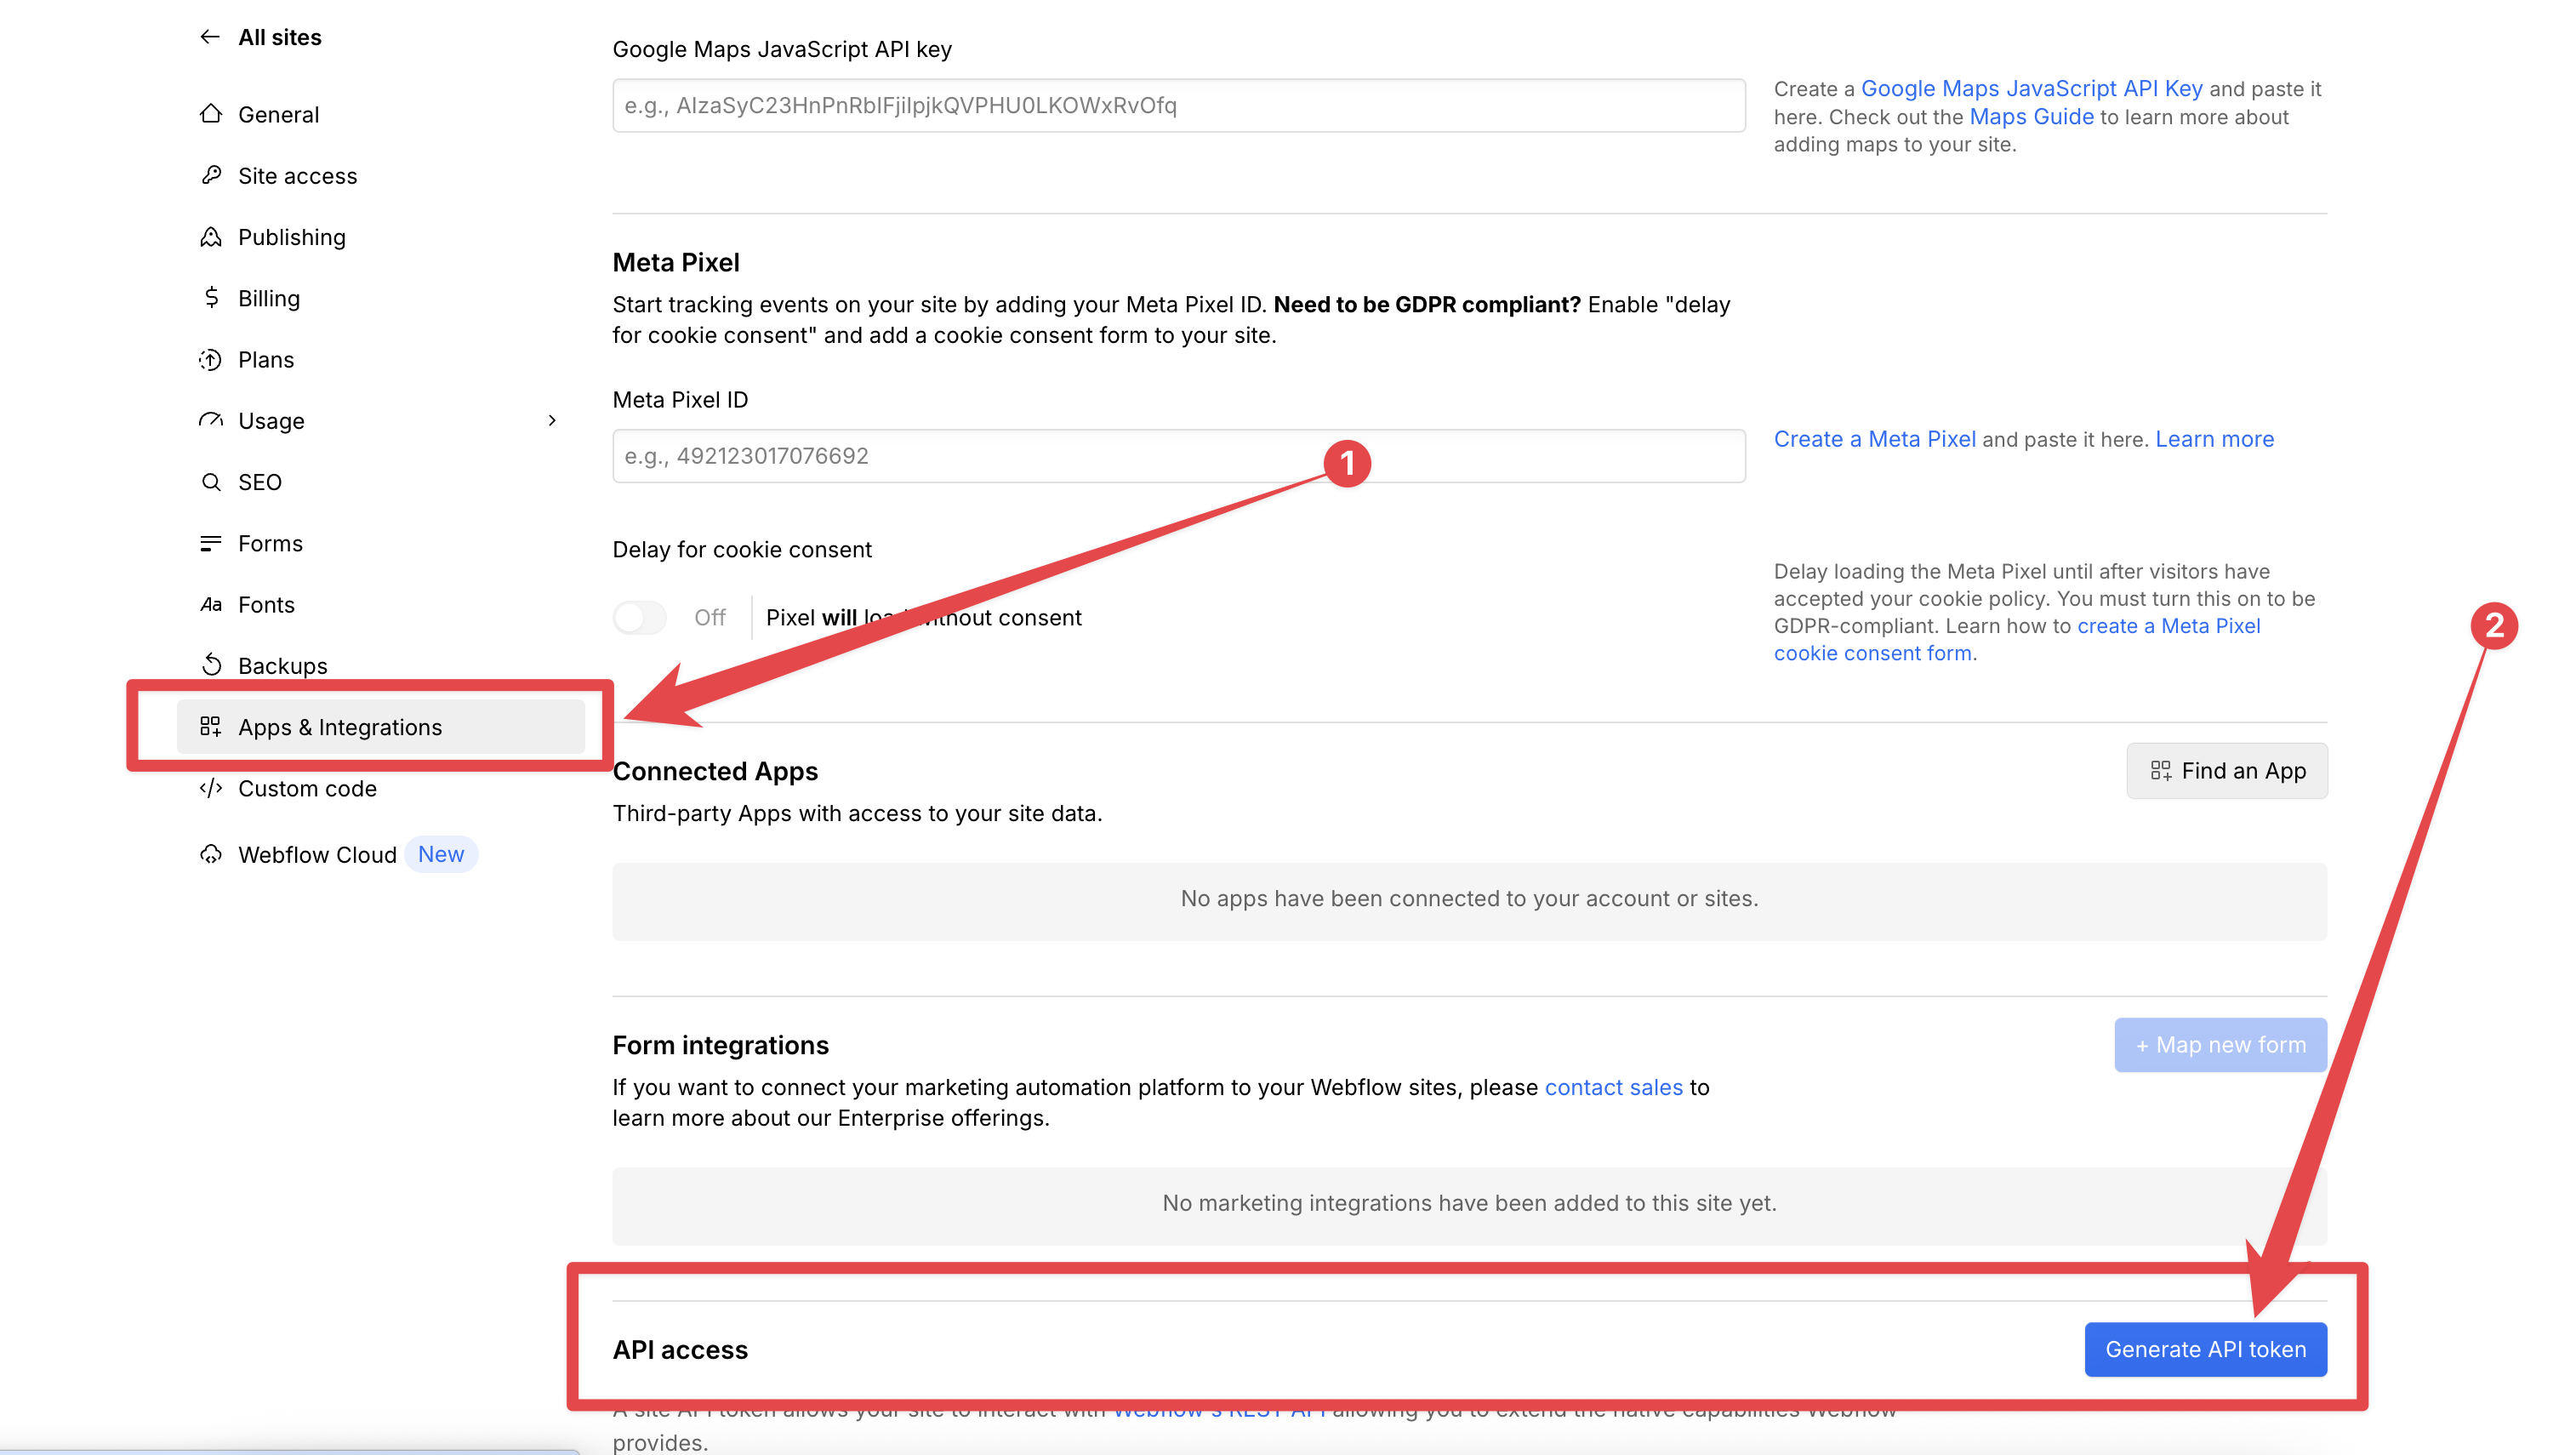
Navigate to your Webflow Settings:
- Open your Webflow project
- In the left sidebar, go to
Apps & Integrations - Scroll to "API Access" and click Generate API Token
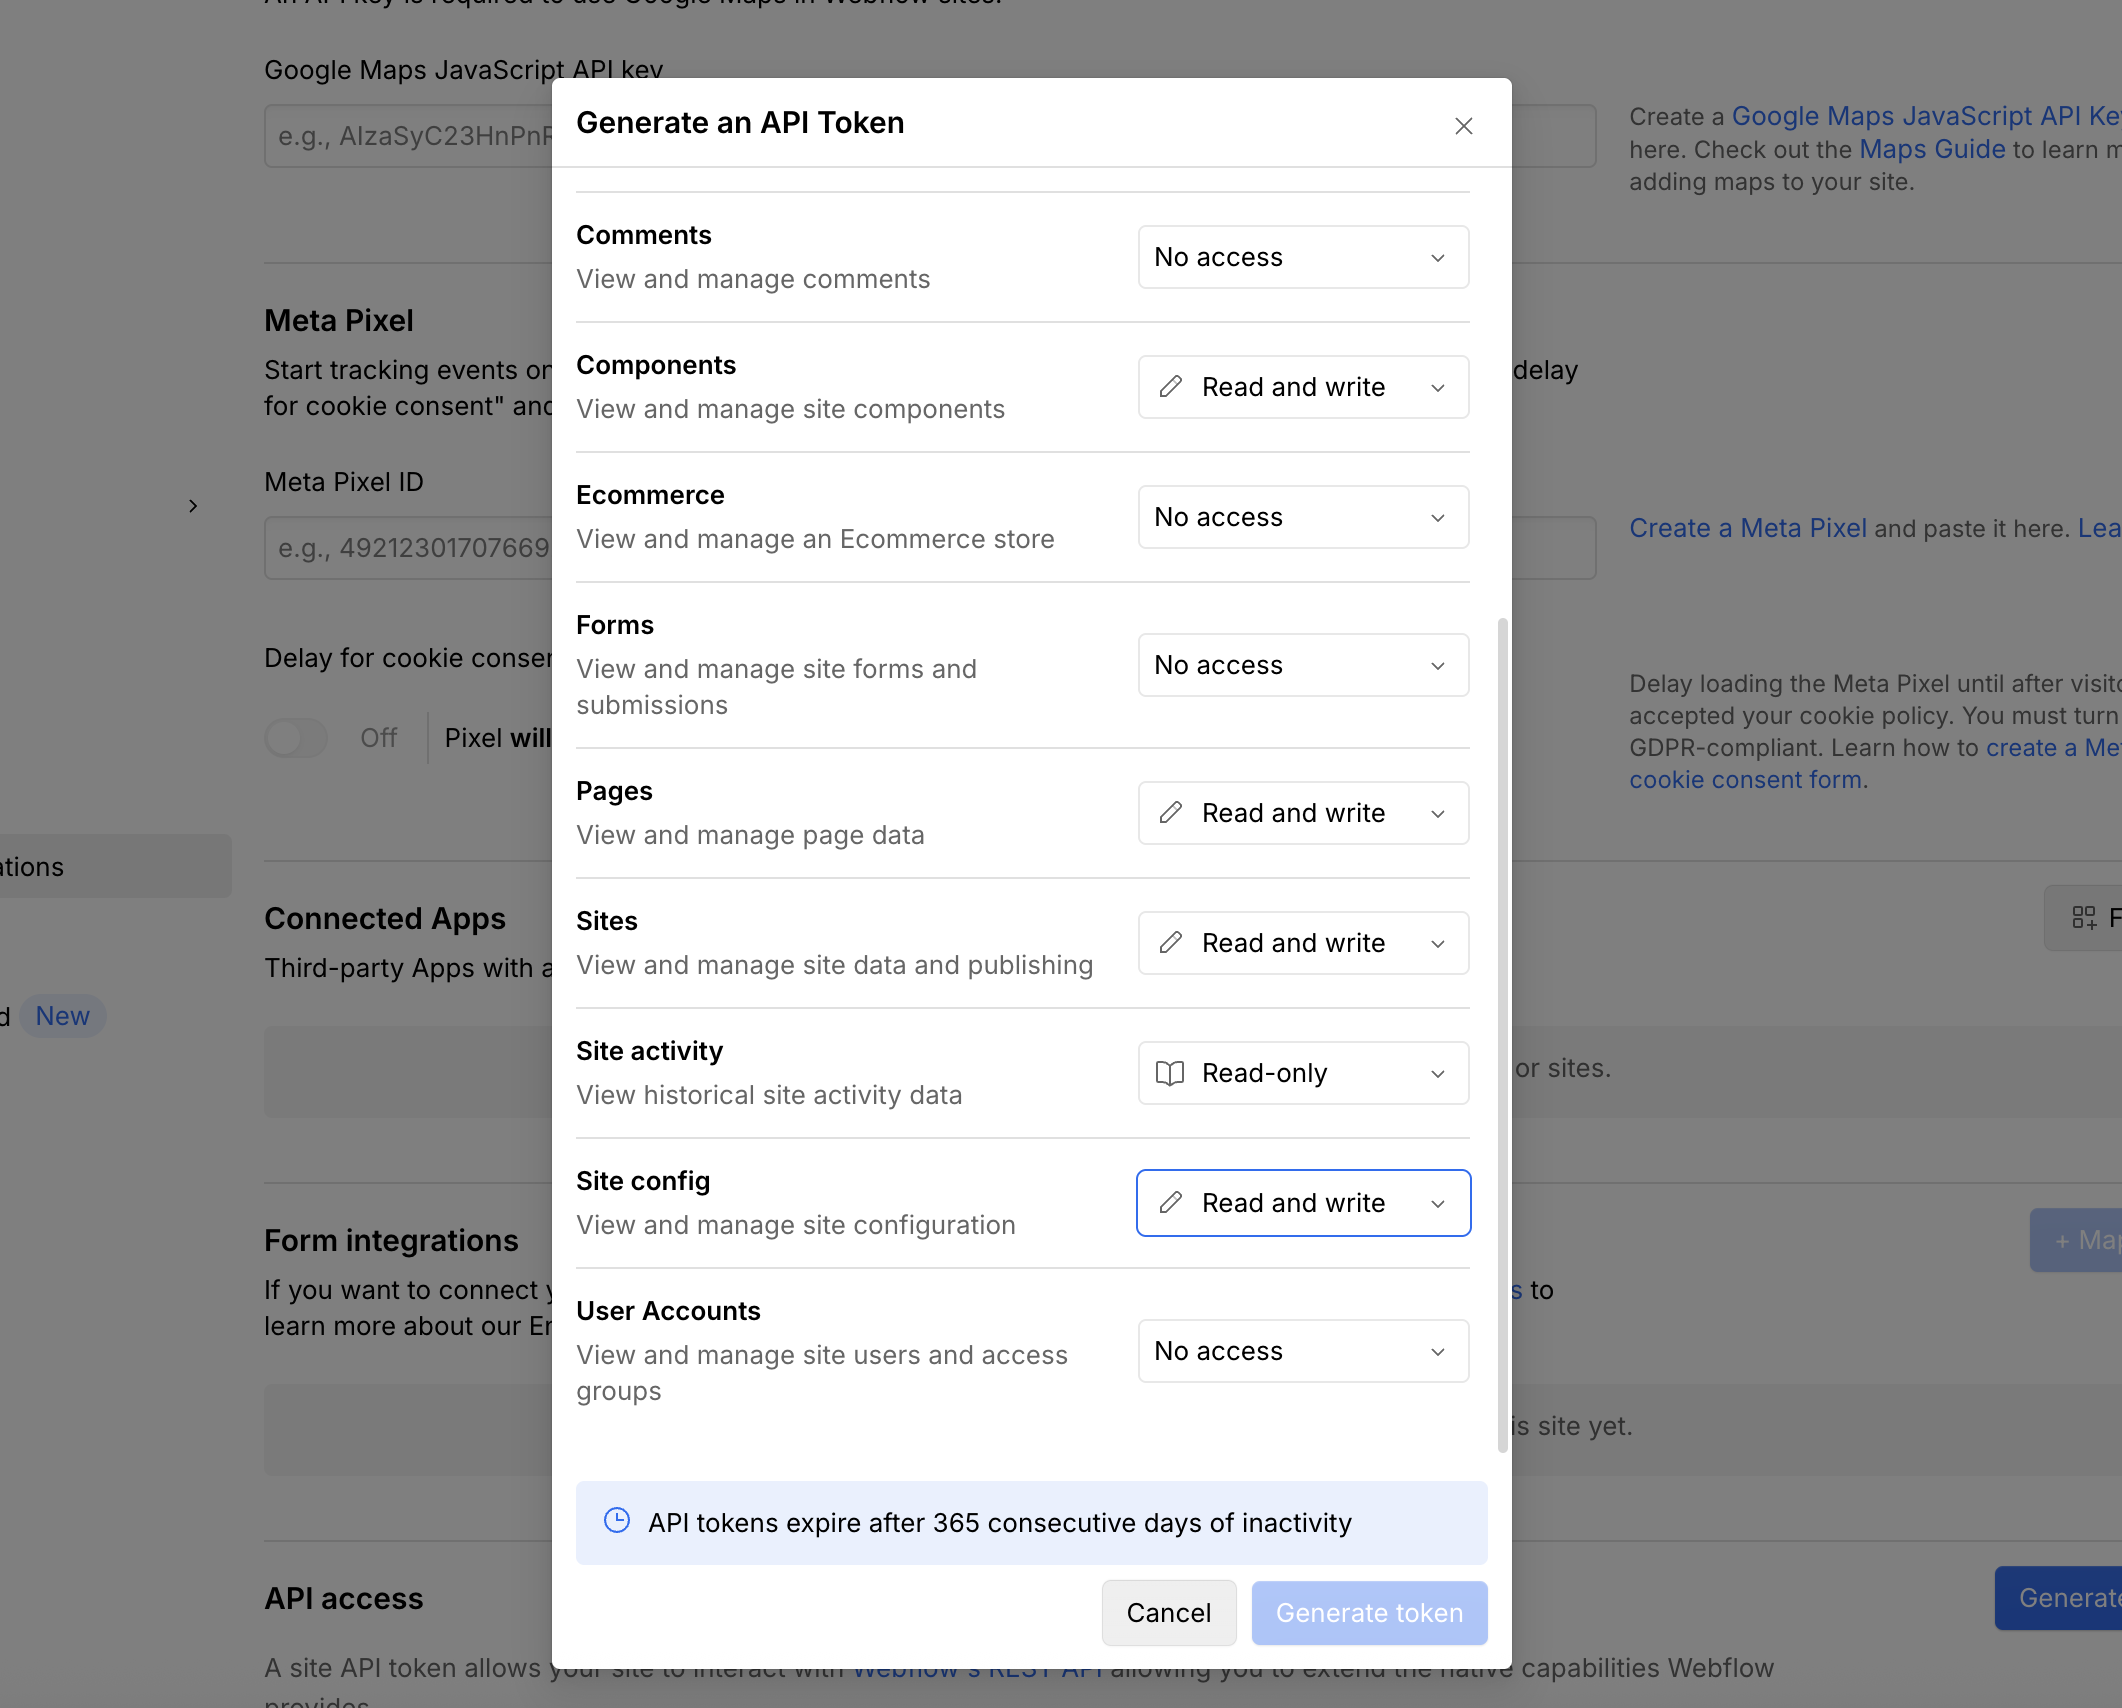
Step 2: Set Permissions for the Token
Name your token (Tip: Name it something like Sight AI).
Give the following specific permissions:
| Section | Permission |
|---|---|
| CMS | Read and Write |
| Assets | Read and Write |
| Components | Read and Write |
| Pages | Read and Write |
| Sites | Read and Write |
| Site Config | Read and Write |
| Authorized User | Read-only |
| Site Activity | Read-only |
| Comments, Forms, Ecommerce, User Accounts | No Access |
After you have granted the permissions above, click "Generate token".
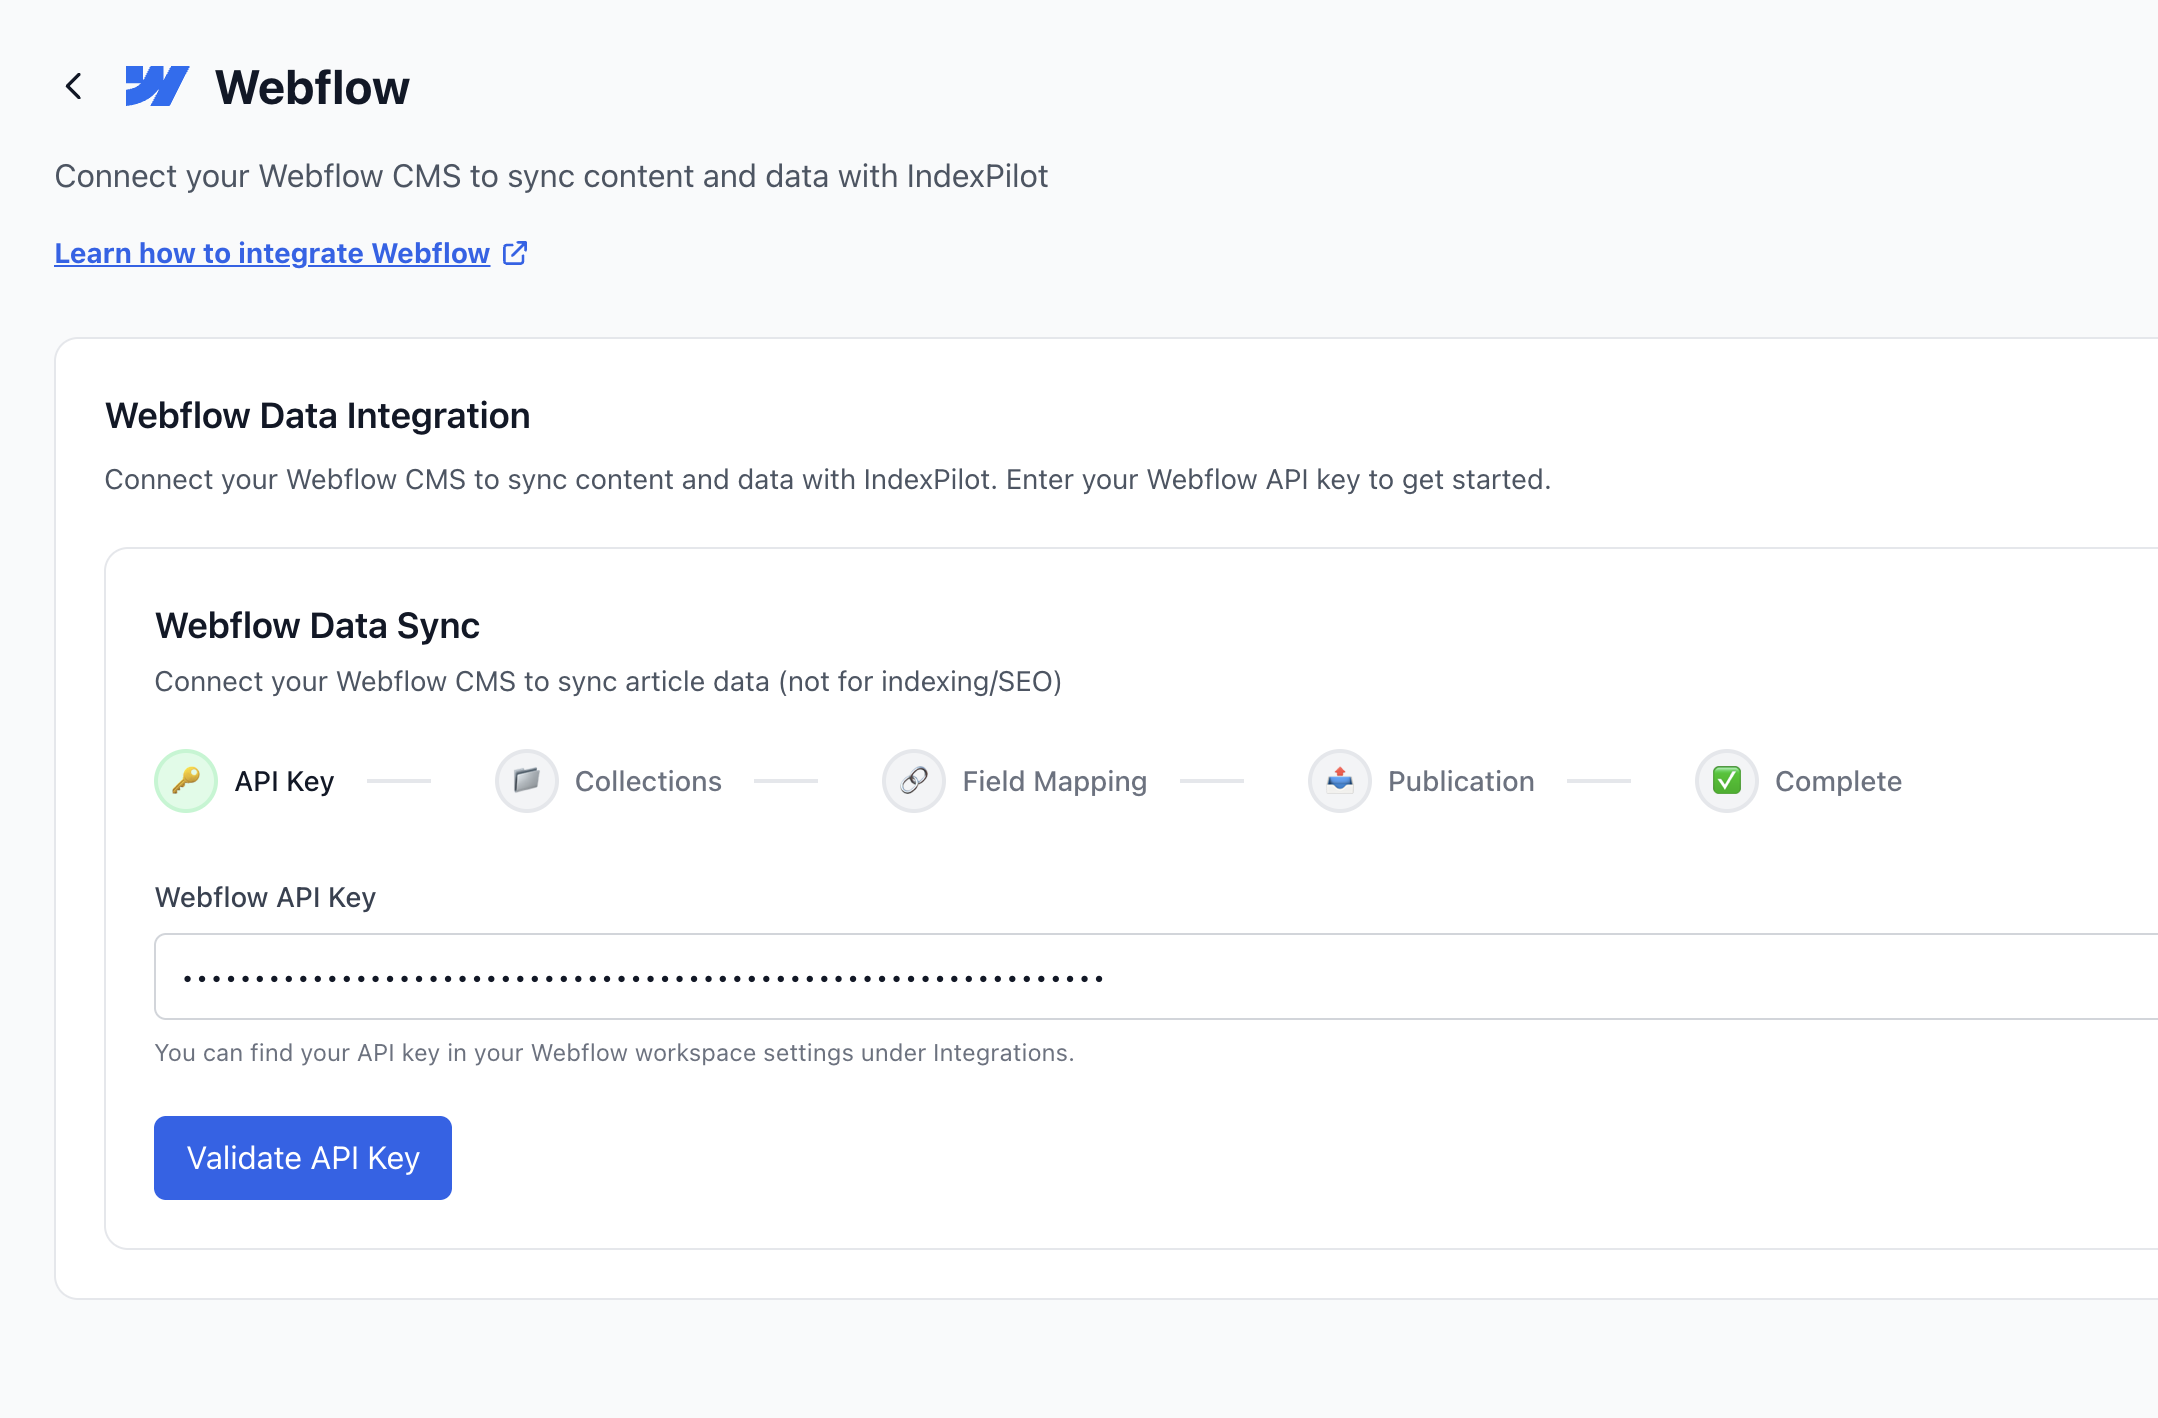
Step 3: Connect Webflow to Sight AI
In Sight AI, navigate to Integrations and select Webflow.
- In Sight AI, go to the Webflow Integration tab
- Paste your token into the Webflow API Key input
- Click "Validate API Key"
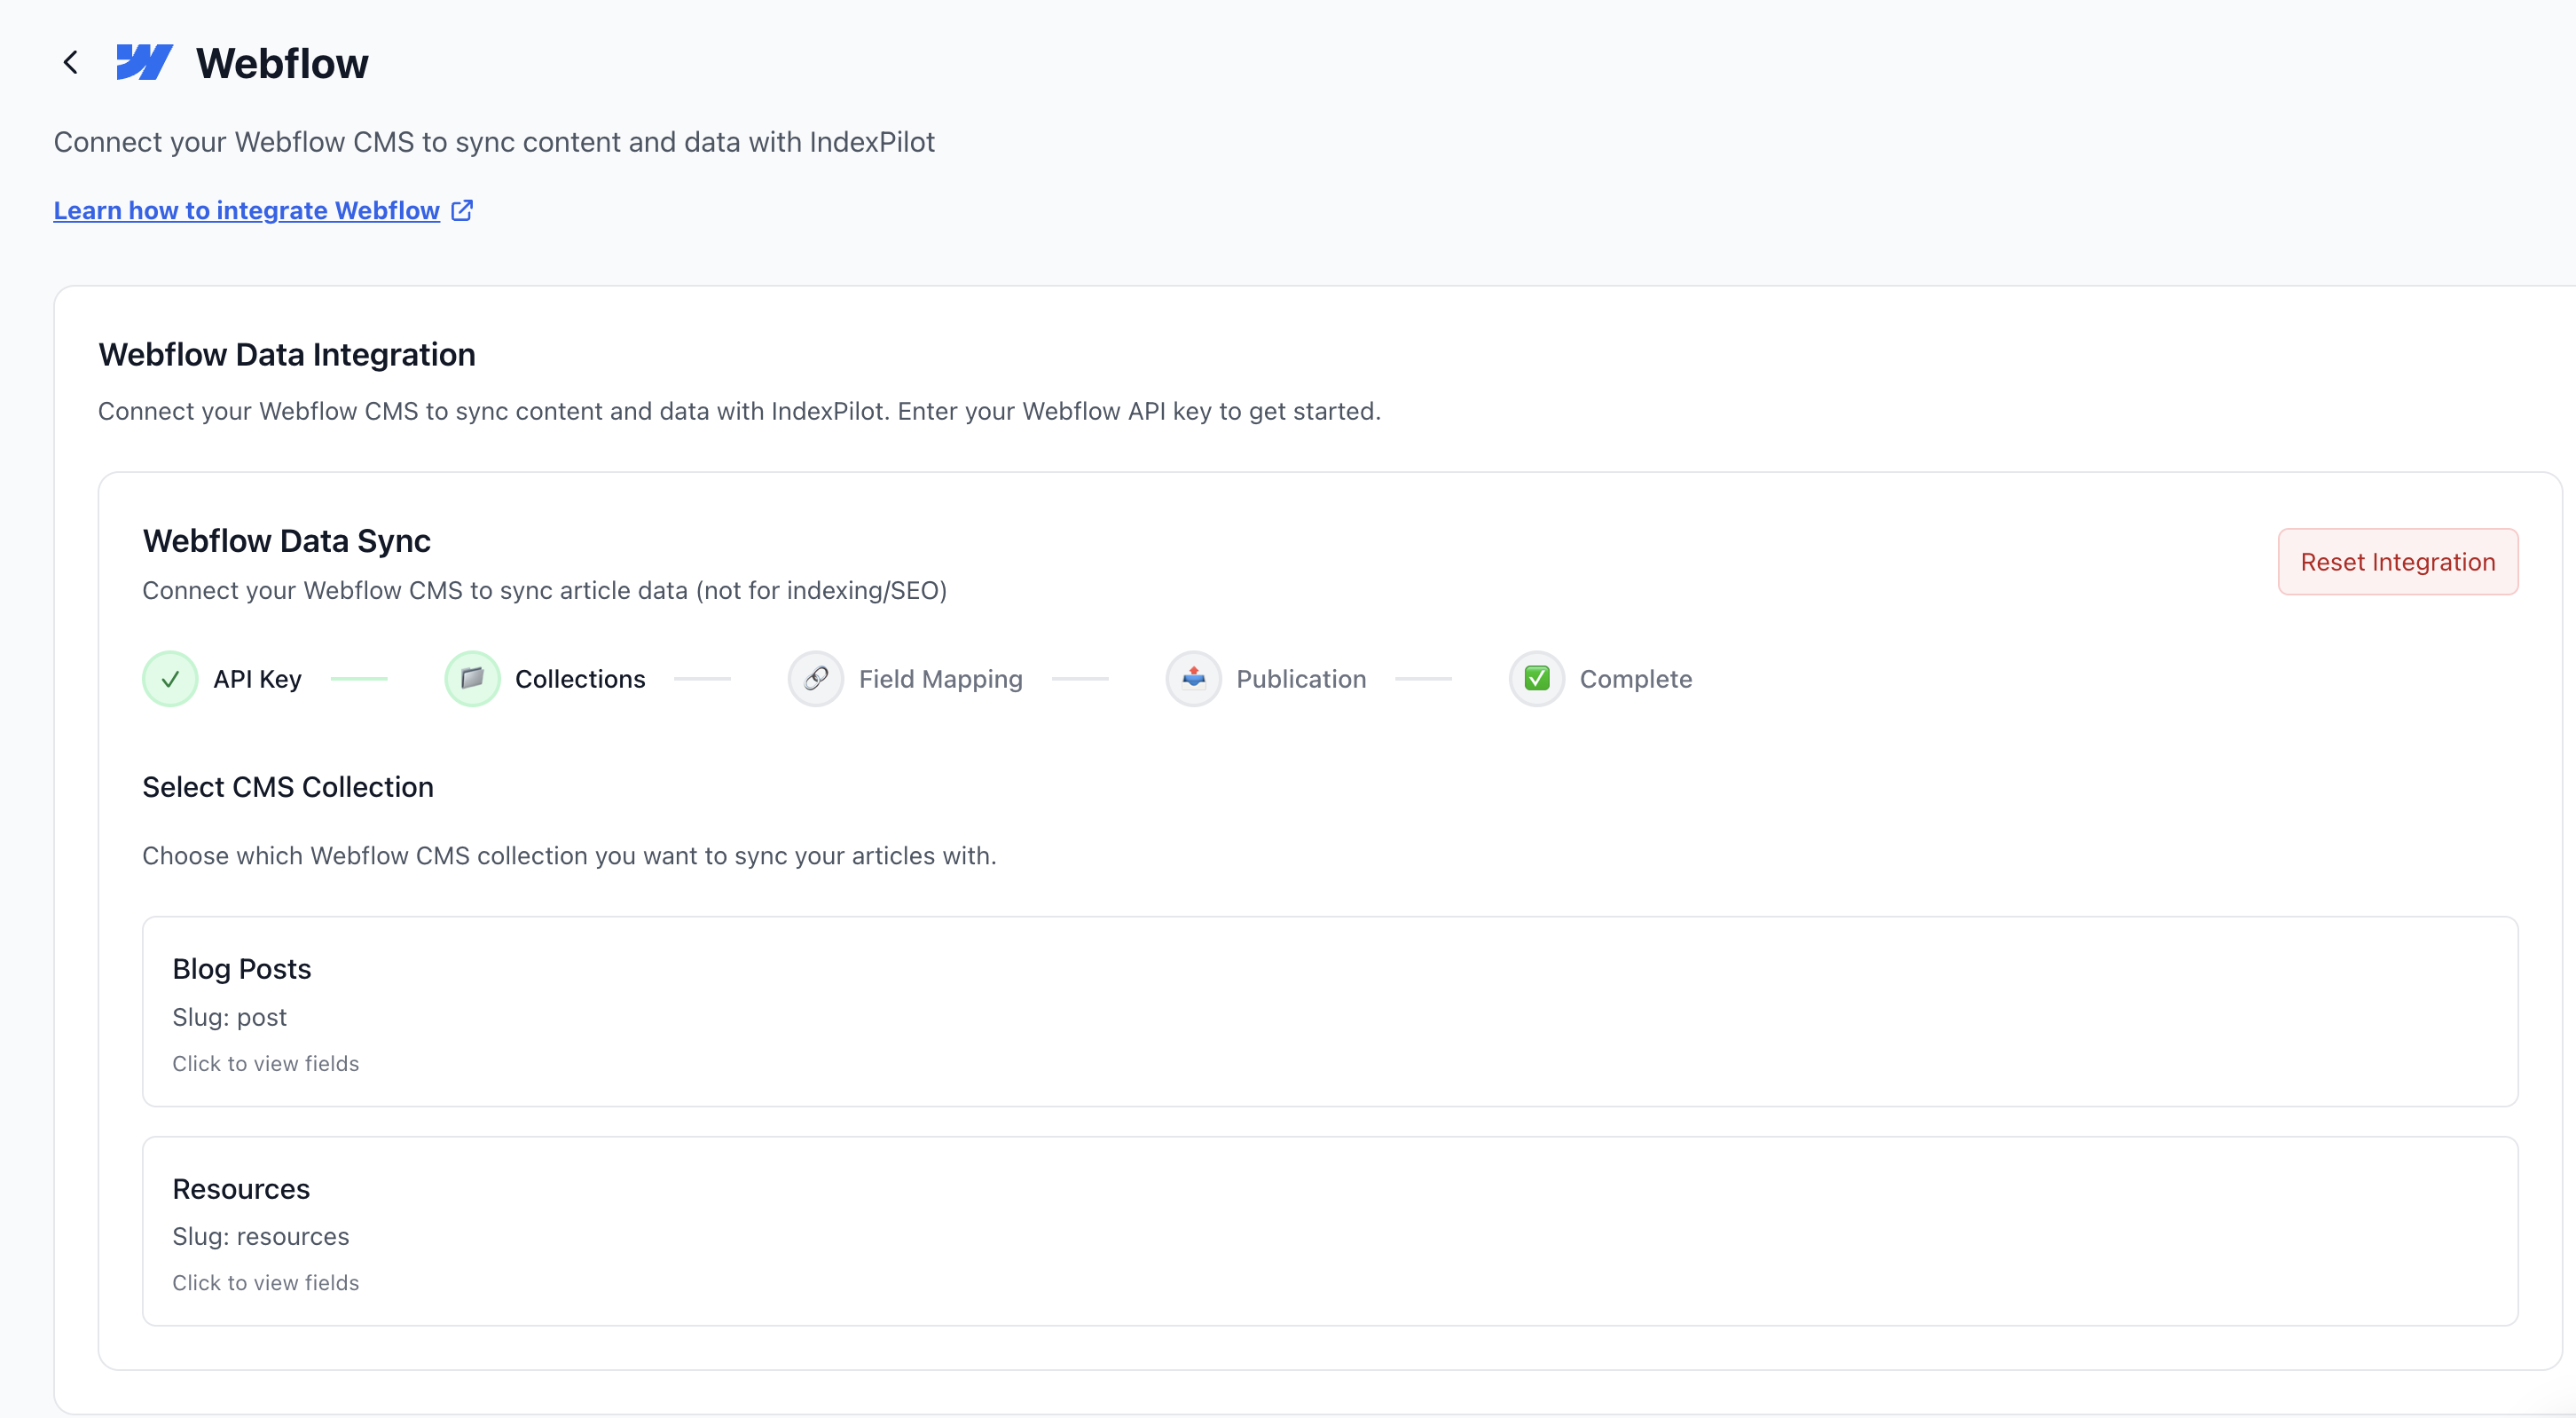
Step 4: Select Your Webflow CMS Collection
After validating the token, Sight AI will automatically pull in your CMS collections.
- Select the one you want to publish articles to (e.g.,
Blog Posts,Resources) - You can click "View fields" to inspect field structure before continuing
Step 5: Map Article Fields to Webflow Fields
Map the required and optional article fields to the correct Webflow CMS fields.
Required Fields:
- Title
- Slug
- Main Content (Rich Text)
Optional Fields (map if available):
- Main Image URL
- Thumbnail Image URL
- SEO Title
- SEO Description
- Category
Note: You cannot proceed unless all required fields are mapped.

Step 6: Configure Publication Settings
Choose how new articles should be handled when synced:
- Save as Draft (Recommended) — review content before it goes live
- Publish Immediately — skip manual review and go live automatically
You can return to this screen anytime to change the setting.
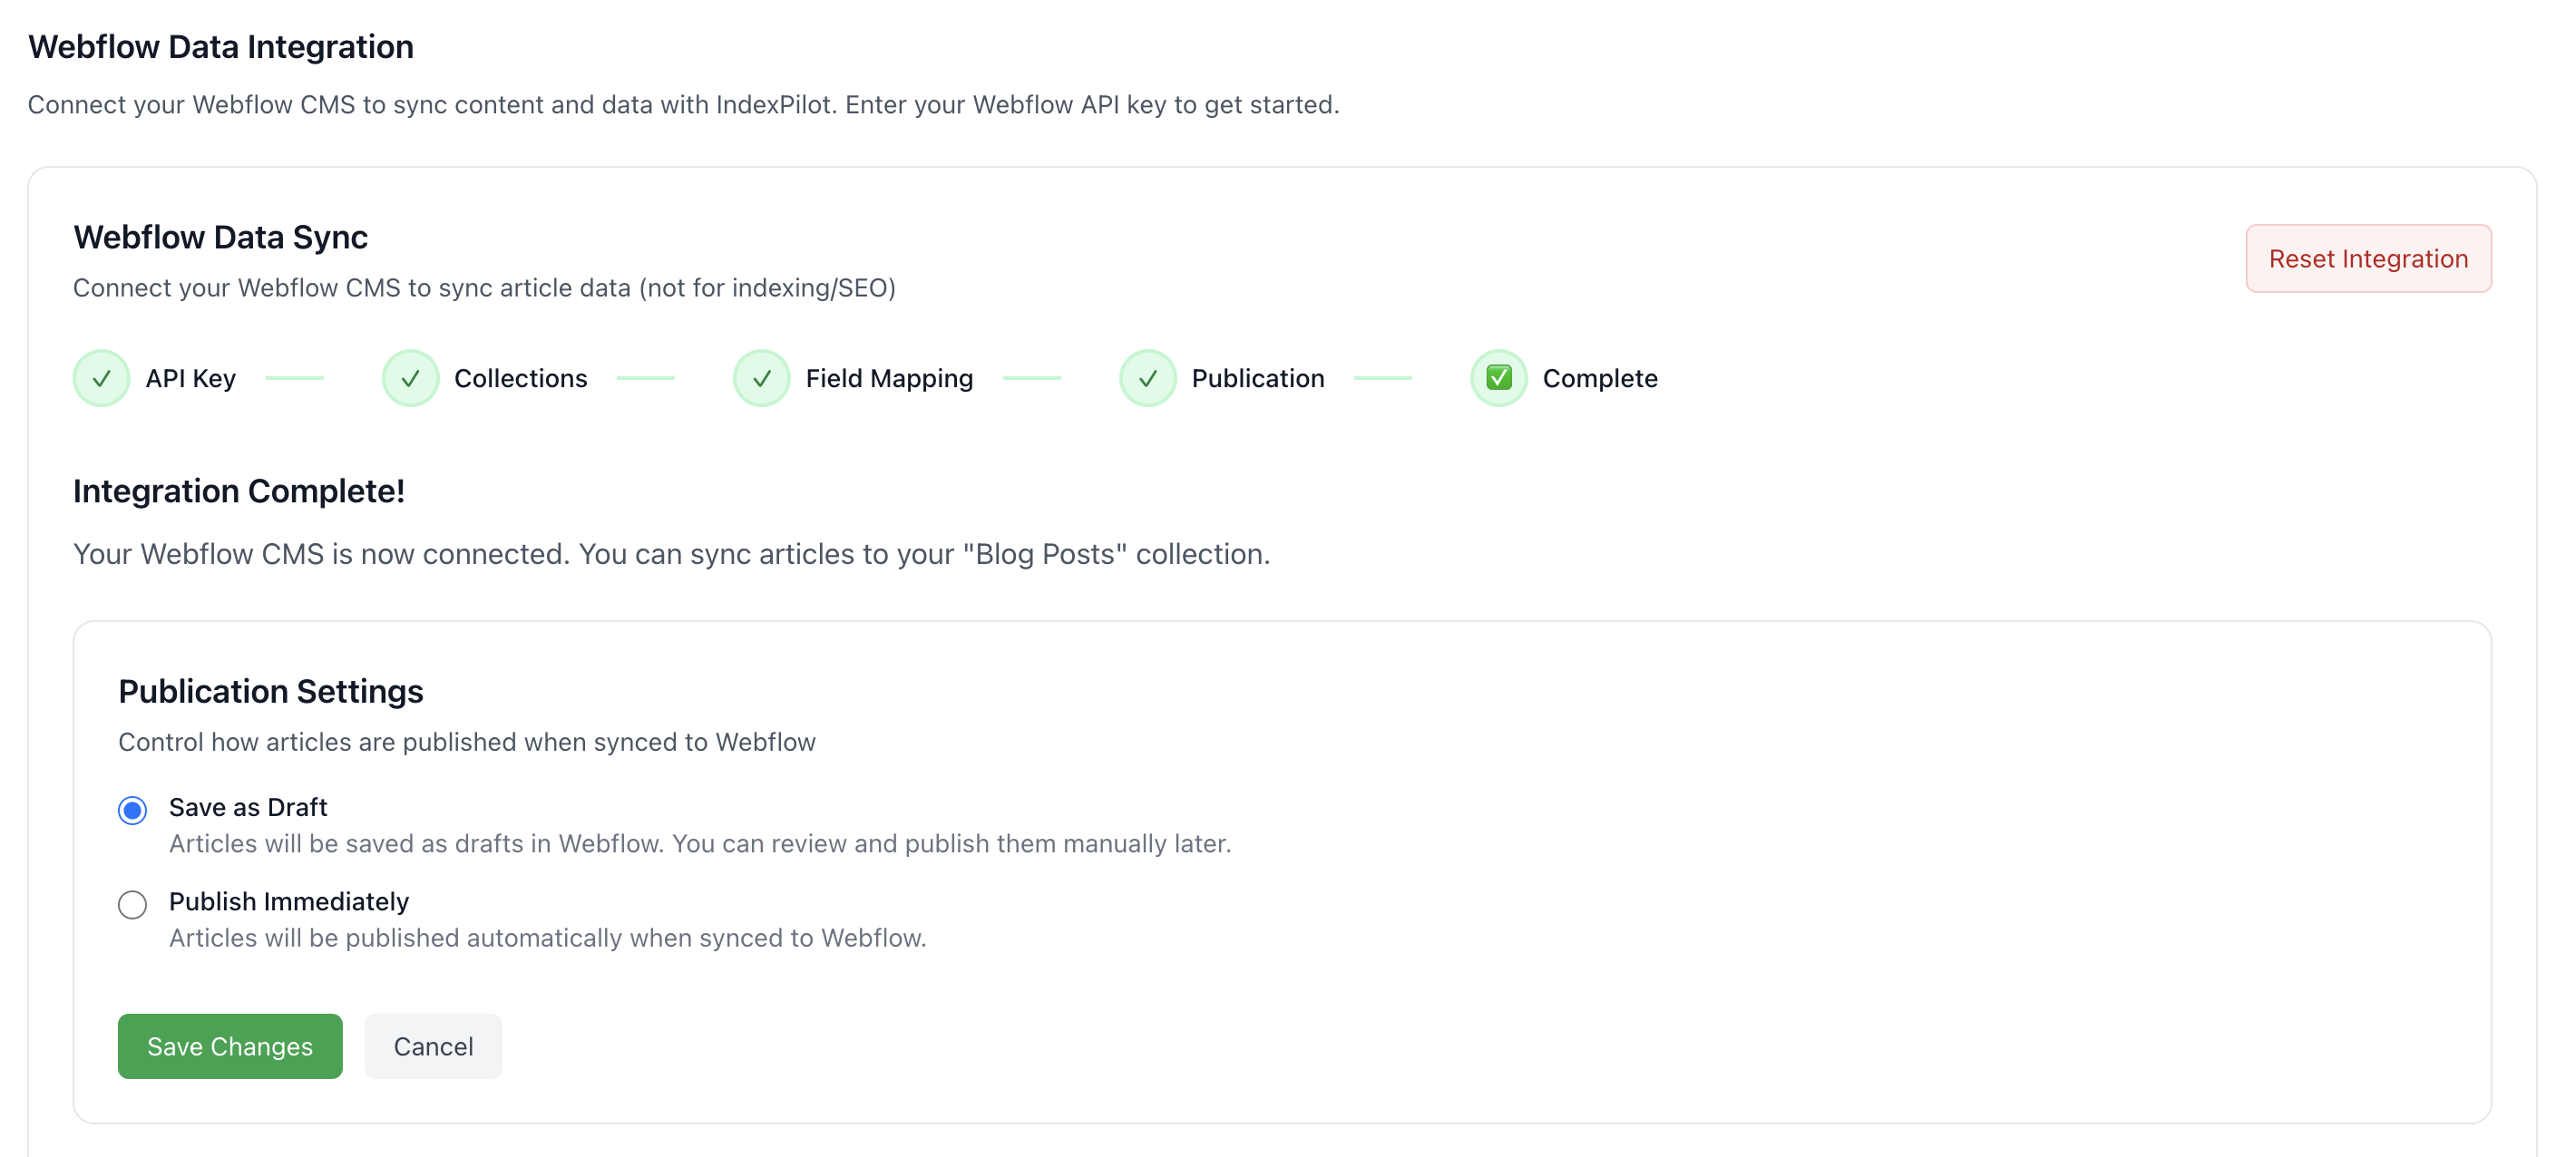
Integration Complete
Once all steps are completed, you'll see a confirmation:
Your Webflow CMS is now connected. You can sync articles to your "Blog Posts" collection.
Final Steps: Syncing Articles
Go to AI Articles in Sight AI:
- Select Single Article or Multiple Articles
- Choose your target keyword and category
- Once the article is generated, click "Sync to Webflow"
Articles will appear in your Webflow CMS according to your publication setting.
Troubleshooting
Connection Expired
API tokens can expire. If you see connection errors:
- Go to Integrations → Webflow
- Generate a new API token in Webflow
- Paste the new token and re-validate
Field Mapping Issues
If content isn't appearing correctly:
- Verify field mappings are correct
- Check that field types match (Rich Text for content)
- Ensure required fields are mapped
Site Not Publishing
If items are created but not visible on your site:
- Manually publish your Webflow site
- Check that items aren't saved as drafts